Fun Easy Art by John Vandebrooke (the best novels to read txt) 📖
- Author: John Vandebrooke
Book online «Fun Easy Art by John Vandebrooke (the best novels to read txt) 📖». Author John Vandebrooke
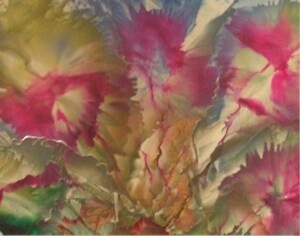
Fantasy Flowers
Sometimes, mistakes can lead to new ideas. Once I inadvertently left some mat media on a paper and when I waxed over it I noticed you could see marks where it had been. Although this ruined that particular art piece, it occurred to me that I could use this accident to my advantage. Anywhere the mat media was left on the page, it would show up as a ghost image in the wax. I took a stencil, painted some paper with mat media, and let it dry. You can hardly notice it when it’s dry, but put some wax over it and the pattern will show up.
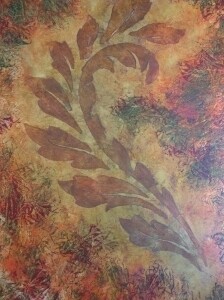
Mat media and stencil
When a student first starts painting I always recommend using the A6 size card stock, as it is about the same size as the face plate of the iron. This way the student will not run out of wax too fast as they begin to learn how to move the iron. Control is developed after making many hundreds of these small paintings, and I am still learning tricks to make different effects each time I paint. The bird on the left was a rubber stamp image placed under the wax to use as a pattern. In the picture on the right, I embedded on the card a sheet of one-ply Kleenex tissue and then painted on that surface with wax to get a very soft, almost watercolor effect.
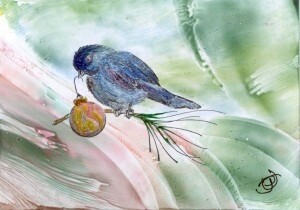
Rubber stamp example
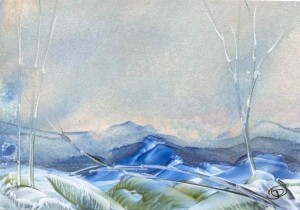
Painting on embedded tissue
These small cards, about 4 x 6 inches in size, make a great presentation when slipped into photo insert cards. Photo insert cards are sold in packs with envelopes, which when inserted in a clear plastic sleeve are perfect for selling. This is also a good size for giving demonstrations. I often sit outside on the sidewalk in front of the gallery and just paint. Soon a small crowd will gather. Kids are especially fascinated with this process. Of course, I can’t resist their wide eyes and wonderment – so they usually walk away with the card I was just painting, as a gift. Who knows what this little art seed might sprout?
When incorporating photographs into my paintings, I often like using images of statues because they seem to lend themselves to this process. Let me show you an example of one that is just a bit different. First, I made a waxed background, and then I carved grooves into the wax with the round stylus point. Next, I rubbed oil paints into the grooves to bring out the colors of the photograph I was planning to use. I had a large print of a Kuan Yin statue and, using a software program, I softened the edges of the image. I then took the image to the print shop and copied it onto regular printer paper. I then took the finished print and dipped the back side into clear wax until the paper became translucent. Now the image of the background could be seen through the paper at the edges, creating a nice visual effect. I fused the image into the background with the hot iron while applying more wax on the surface. This was just one of many looks I have created using photographs. With endless possibilities to explore, the photographers in my classes are always excited to work with wax.
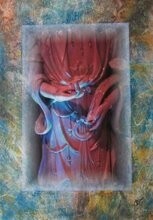
Kuan Yin
I met an artist who showed me a little press called a Cuttlebug, which allows you to cut and emboss card stock. You run the card stock through the press while using some of the supplied embossing plates. Later, I discovered that I could create my own plates using raised images. I was so sure that this would be a good match for working with wax that I had to go out and buy this press right away. I waxed over these embossed surfaces, and also embedded tissue over the surface first and then wax, which would create those soft textures and give that watercolor look. Here is one of those waxed card surfaces to give you a feel for what is possible.
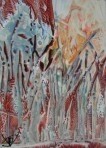
Embossed 1
When embedding objects in wax you need to use a lot more wax, but you can do some of it with thin layers. In the next picture I used an image transfer together with some images printed with my ink jet. I also inserted a piece of silk scarf, as well as some thick wax strips fused to the surface. I then pressed the raised wax strips with a heated leather tool. After taking this photo, I also used a hot foil pen to write on the wax with gold and blue foil. Once you let your mind start to roam you never know what you will come up with.
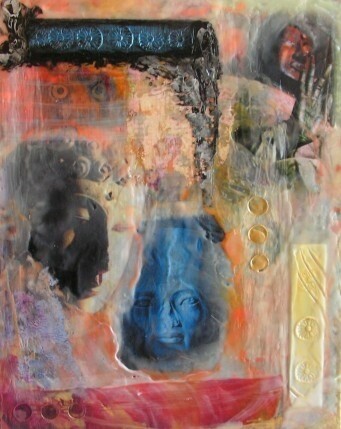
Ancient Wisdom
An example of that roving mind might be when I saw a stencil sheet of numbers in a scrapbook store. I was sure I could do something with them. I began with a cradled board and waxed the surface so that I could heat fuse the stencil into the wax. I began to pour diamond glaze in puddles on different numbers, raising sections with different heights. I used a glue gun to write numbers on the sides of the board and then painted over that with iron oxide, which I then rusted with a chemical. I got the idea as I went along that it could be an interesting clock – so I got some clock works, drilled a hole in the middle, and inserted the hands. Again, a fun project that was only discovered going along with the creative process.
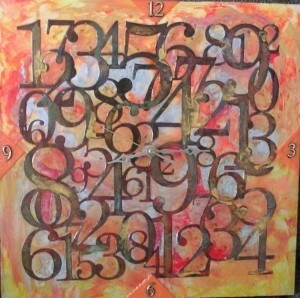
Clock
So you are getting the drift that I like to play. One day while my grandson was in the studio (he loves to paint with wax, by the way), we were dreaming up different items to wax. We took a blank puzzle kit and began to wax them to see what we could create. Not knowing how they would end up being used, I let them sit around the studio for a while. I finally decided they had to go somewhere and began a large waxed background. I cut up the surround for the puzzle and began to paste it into the wax along with the puzzle itself. A strip of a silk scarf went into one edge.
I began to like this project and decided to mount it on foam core, which was a mistake. As I glued it down the foam core warped and became concave. I learned I should have pasted the back side as well and that would have kept the work flat. This picture does not appear concave here, as it was still nice and flat at the time; but when this happened I decided to keep going and poured a lot of jewelry ice resin over the picture. Now it really looked different and when I went to frame it, of course, that was a challenge. I ended up having to buy some upholstery cord in black to match the frame and glue it along two exposed edges to give it a finished look. Here is the before picture, as the after image is hard to photograph because the resin coating is so reflective.
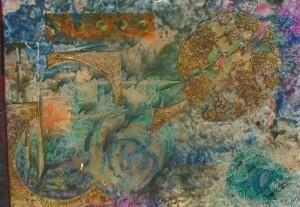
The Solution
While looking at one of my small landscapes one day, wondering how to create a different looking tree, I hit upon a new idea for creating a three-dimensional surface. By laying a piece of one-ply Kleenex over the area and painting the tree on the Kleenex, the hot wax will go through and stick to the surface below. This creates a raised area. I discovered I could wet the exposed Kleenex and it would wipe away, leaving the now raised tree. It was rather clever, because you don’t disturb the rest of the wax area in any way and yet are able to insert this into the wax.
Working with a picture of a Japanese woman I found in a book, I decided to use this method to give her dress a fabric-like feel. First, I made an abstract soft background and, then, with some tracing paper underneath I got the outline transferred onto the wax. Now I could use the stylus to wax in her image. When I came to the clothing, here is where I wanted to use a raised surface that would seem cloth-like in texture. Because one ply of Kleenex is so thin, you can see through just enough to discern the pattern. Waxing different colors on the different areas of her dress gave the cloth effect I was looking for.
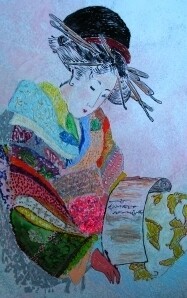
Fabric texture example
Working with different image transfers, I tried the process of using overhead projector film and then transferring the images onto another surface with gel medium. While doing that I had the idea of using the film with the print image as a see-through layer laid over a waxed background. Now the waxed background would show through, and soon I had some new looks as a result. In the one with the woman, I made a mix of regular image transfers along with the cut film. Coarse granular gels, as well as Diamond Glaze, are used in the first image below. The other one, the chest image, used just the film over a waxed under-layer. I might have taken the idea from the time I used a photograph that I printed on a silk transfer paper, and then draped the silk over some wax patterns, heating the silk with the iron until the wax lifted up into the silk – creating a pattern on the body of the model. One discovery always leads to another.
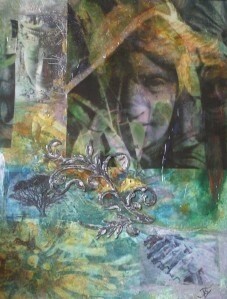
Emerging
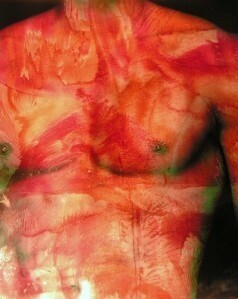
Chest
Collage with all sorts of materials is a fun technique to explore. While I was teaching in California I met an artist who showed me some papers she had purchased on eBay. They were pages out of some county court records. She used these pages in some of her art work, so I thought I should give that a try. She gave me one of these pages to work with and it forms the background in the image below. I had fun mixing image transfers and other papers into this collage.
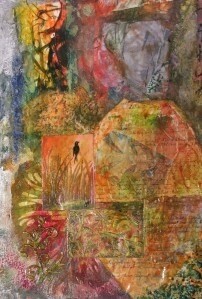
No Judgment
Another of my collage projects is called the Global Series. Here I used stretched canvas as the substrate. I first glued down different tissues with mat media, which when dry stretched the canvas taunt. I painted some of those tissues with mica paints and in some cases dribbled some Diamond Glaze over the surface. The only areas waxed in this series of paintings were the circular coffee filter papers fixed to the surface. I am always looking for some different product to work with and really like the look of this series. I crinkled up the filters first before waxing. This is also something I have done to other paper, waxing the tops of the wrinkles and then using other media to fill in the valleys. These papers were then cut up into different patterns and used in collages.
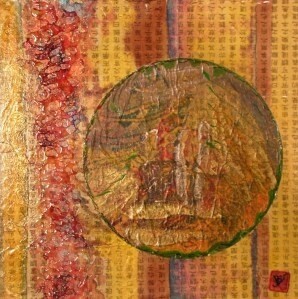
Global 1
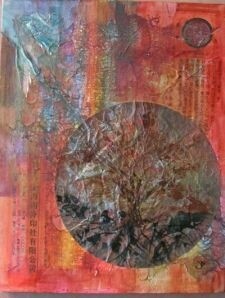
Global Series 2
A collage experience that I have come


Comments (0)